No network doesn’t necessarily mean that there is no network available for your SIM/network provider. There might be some other problems due to which your phone couldn’t connect to the network properly.
Whatever be the reason behind this problem, there are various methods using which you can easily fix the issue. In this tutorial, we will guide you how to fix no network problem on your Android phone. Let’s start this tutorial!
Table of Contents
1. Choose the network manually
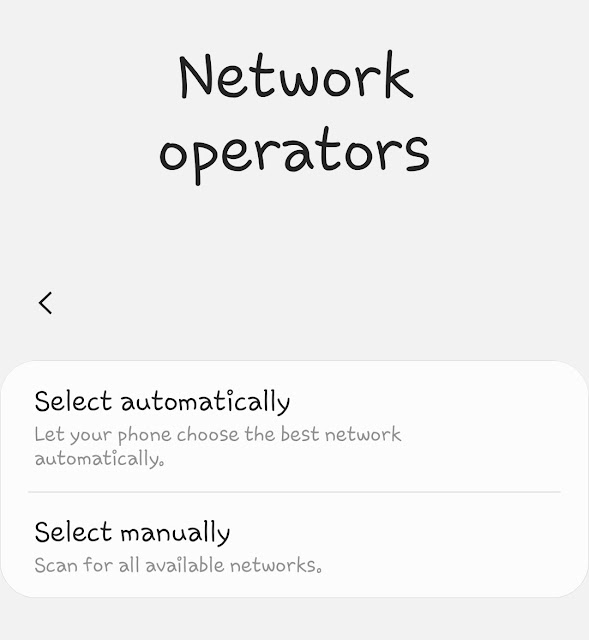
The mobile network settings on Android gives you the power to set the network operator manually. When your phone is unable to connect to any network by itself and shows the “No Network” problem, then you can use this method to check if there are networks available or not. Here are the steps –
- Open the Settings app on your Android phone.
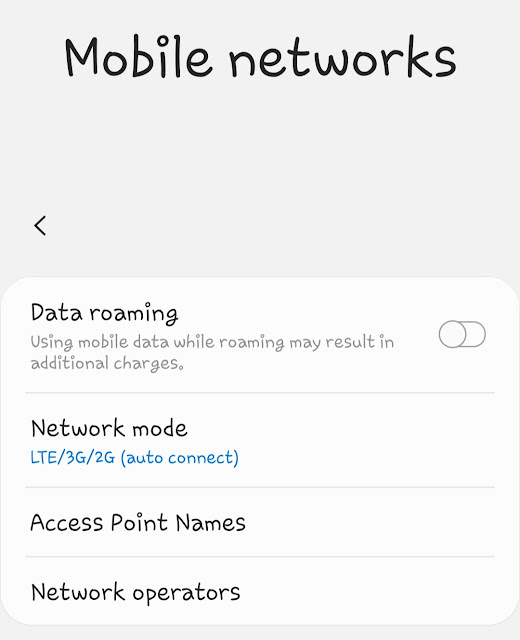
- Click the Connections option and then go to Mobile Networks > Network Operator.
- If you are using dual SIMs on your phone, then select the SIM for which you want to set the network.
- Now you will see two options on your screen: Search automatically and Search manually. The first option lets your phone choose the best network automatically. On the other hand, the second option will scan for all available networks and let you choose them manually.

2. Choose network mode
Network mode allows you to switch between different network modes like 2G, 3G, and LTE. As the mobile network, either you can choose network mode manually or allow your phone to choose it automatically. Follow these steps –
- Again open Settings on your Android phone.
- Go to Connections > Mobile networks.
- Click the Network mode option.
- Now choose any network mode you want to use. We recommend you to select “LTE/3G/2G (auto connect)” option as it will let your phone choose the right network mode automatically.

Network mode is also helpful if your phone isn’t connecting to the internet after turning on mobile data. You can choose the network mode of your SIM manually. For example, if you have a 4G SIM, then you can select LTE network mode.
- Also read: How to set APN settings manually
3. Use Airplane/Flight mode
You can also use an airplane or flight mode on your Android phone to fix no network problem. Flight mode simply disconnects your phone from the mobile network. When you will turn off the flight mode again, your phone will try to connect to the network again.
To turn on flight mode on Android, open the quick settings or notification panel by swiping down from the top of the screen and then click on the flight mode icon. After that, wait for some time and disable the flight mode again.
4. Restart your phone
Restarting your phone does the same work as turning on and off the flight mode. As you restart your phone, it will search for the available networks and connect to the right network in the background automatically.
5. Reinsert the SIM card
Sometimes you haven’t inserted the SIM card properly due to which your phone is unable to detect it. This might be the reason why you are facing no network problem on your Android phone. It is very easy to fix this issue. Just reinsert the SIM card properly and check if you get the network.
6. Check network connection in your area
Sometimes there is no network available from your network provider itself due to which your phone is unable to show any network. To verify this, check if other people in your area are getting network connection from the same network provider as yours. Change your position and go to a higher altitude as it is more likely to receive a network signal.
So these are some methods that you can apply to fix no network problem on your Android phone. Try these methods one-by-one and let us know if they worked for you. If you are facing any problem related to this tutorial, please share it with us in the comments below.


