Ideally, a good URL should be short and simple so that you can easily share it with anyone. It should contain the right keywords such as your YouTube channel name. Luckily, YouTube does have an option that allows users to set a custom URL for their channel.
A custom URL (also known as ‘vanity URL’ sometimes) will give a professional, branded and easy-to-share link for your YouTube channel. In this tutorial, we have shared a complete guide on how to set up a custom YouTube channel URL. Now without further ado, let’s quickly jump to the main topic.
Table of Contents
Eligibility criteria to get custom YouTube channel URL
In order to get a custom URL for your YouTube channel, you must be eligible. Here are eligibility requirements –
- You should have more than 100 subscribers.
- Your channel should be older than 30 days.
- You should have a photo as a channel icon on your YouTube channel.
- You should also have a photo as channel art (aka cover photo).
If you meet all these requirements, then only you will be able to apply for the custom YouTube channel URL.
- Also read: How to post stories on YouTube
Check if you are eligible
Once you meet all the above requirements, you will be automatically eligible to get a new custom URL for your channel. YouTube will send an email notification and notify you in your Creator Studio dashboard.
Apart from that, you can also check your custom URL status in the Status and Features page on YouTube.
Steps to create a custom YouTube channel URL
It is quite easy to claim a custom URL on YouTube. Just follow this step-by-step guide –
- Open any browser like Google Chrome on your PC/laptop/smartphone and visit the YouTube website. Make sure that you are logged into your account/channel.
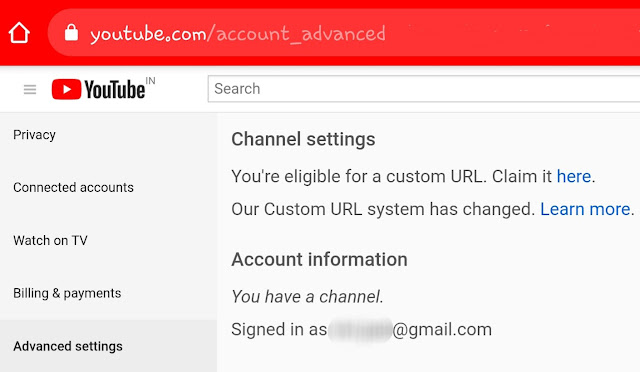
- Now click your profile picture icon at the top-right corner and then tap the Settings (gear) button. Once you are on the Settings page, click the View Advanced Settings option. It will take you to the Advanced Account Settings.

- If you are eligible, you will see a link next to the Custom URL option named You’re eligible for a custom URL, claim it here. Simply, click on this link.

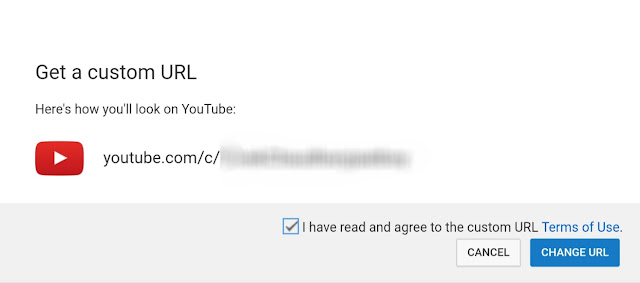
- Now a pop-up box will open where you will see the custom URL(s) you have been approved for. You can’t change the part in the grey box but you can add a letter and/or numbers after it to make your custom URL unique.
- Once you want to continue, select/checkmark “I have read and agree to the custom URL – Terms of Use” box and then click Change URL button.

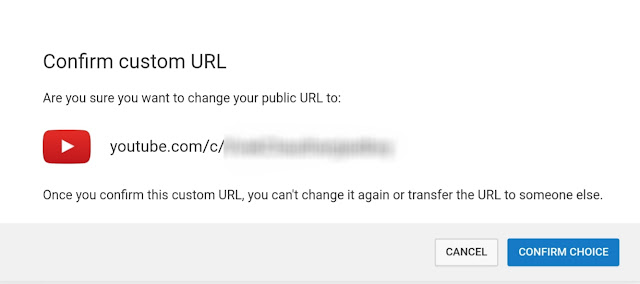
- In the next step, you will be asked to confirm your action. Tap the Confirm Choice button. Done!

YouTube has changed its policy so now you are allowed to change your custom URL up to 3 times per year. For more information on this topic, you can read our guide on how to change your YouTube channel URL.
So that’s everything you need to know about getting a new custom URL for your YouTube channel. If you have any question in your mind regarding this topic, share it with us in the comment section below.


