Now if we talk about reducing the size of your blog images, it is important to consider their quality at the same time. In this tutorial, we have shared some useful tips that can help you to reduce the size of your blog images without losing their quality.
We have also discussed how you can resize and compress your images on Blogger directly after uploading them. Before moving further, we will recommend you to read another useful tutorial on image SEO optimization that can help you to optimize your blog images and make them more seo-friendly.
Table of Contents
Compress your blog images using online tool
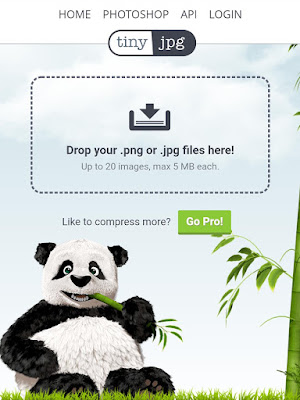
There are a number of online image compressor tools available for free that you can use to reduce the file size of your blog images. We will recommend you to use TinyJPG as it is the best image compressor tool with a very unique user interface.
It will analyze your image first and then apply the optimal compression technique to reduce its size. You will get a compressed image with the same quality as before. Not only JPG (or JPEG), but you can also compress PNG images with this tool.

Another good thing is that you are allowed to upload multiple images (up to 20 maximum) at the same time. To compress your images, simply go to the TinyJPG website and upload your images(s). Once they are compressed, you can download them to your device. As simple as that!
Note: If you are using WordPress, you can also use the official plugin of this tool named Compress JPEG & PNG Images to directly compress your blog images, even those which you have already uploaded.
Compress images on Android
If you create or edit most of your blog images on your Android phone, you can use a third-party image compress app (such as Image Size Reducer) to compress them. For more information on this topic, you can read our guide on how to compress images on your Android phone without losing their quality.
How to resize your images on Blogger
Blogger also provides an option to resize the images you have uploaded on your blog post. Resizing will reduce the size of your blog images, however, their quality will also be affected a little bit.
This step-by-step guide will show you how to resize and compress your images on Blogger –
- First, login to your Blogger account and go to your blog dashboard.
- Create a new post or open an existing one.
- Upload the image you want to add to your blog post.
- Now click on the uploaded image and then you will see resize options below it. You can set the photo size to Small, Medium, Large, X-Large or Original Size.

If you want to maintain a sharp quality of the image and reduce its file size also, then we will recommend you to set the photo to either Large or X-Large size.
Reduce images size on Blogger manually
You can also reduce the file size of your images on Blogger simply by making some slight changes in their URLs. This method will not resize the image. Simply, follow these steps –
- Create a new post and upload the image.
- Switch to the HTML view by clicking the HTML button below the post title.
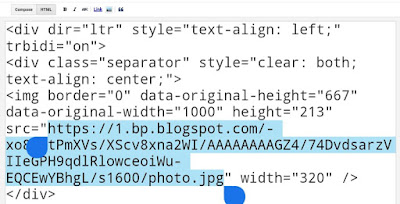
- Now find the URL of the image in the src attribute of its img HTML tag. It looks something like this:
https://4.bp.blogspot.com/-C1XF6336dpY/WVs1zmzwBxI/AAAAAAAAECU/QUWoArv7yV8QNKMCB9O1-6hOKTmnBssCACK4BGAYYCw/s1600/image.jpg
- In this URL, you have to change the value of s1600, which represents the size of the image. Here 1600 is the original size. To reduce the size of your image, change this value to s640 (for better quality) or s420 (for low quality). That’s it.
So these are some methods that can help you to compress images on your Blogger blog without affecting their quality. We hope you find this tutorial helpful. If you want to ask something, you can share it in the comment section below.