In our previous post, we have discussed how to download and send stickers in WhatsApp. There are a limited number of built-in sticker packs in WhatsApp, however, WhatsApp also allows you to add stickers from third-party apps.
This tutorial will guide you how to make your own personal WhatsApp stickers from normal images (including selfies). You can add these stickers in a custom sticker pack and send them to your WhatsApp chat.
Table of Contents
How to create your own personal WhatsApp Stickers
WhatsApp stickers are made of PNG image file. You will need to use two applications to create your own personal stickers for WhatsApp. First one is Background Eraser app, which will help you to remove the background of an image and create a PNG sticker.
After this, we will use Personal Stickers for WhatsApp app to create a custom sticker pack for WhatsApp and add it to your chat. Let’s get started!
How to create PNG stickers for WhatsApp
Follow this step-by-step guide to create a PNG sticker from the normal images (including your selfies) –
- Download and install Background Eraser app on your phone.
- Open the app and tap “Load a photo” button to load the photo whose sticker you want to create.
- Crop the photo as much as possible and then tap the “Done” button.
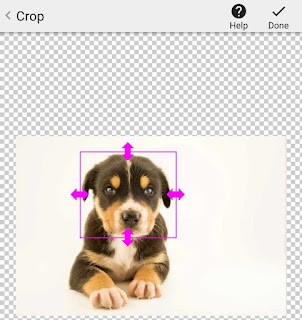
- In the next screen, you have to erase the background of an image. Either you can use an auto option to select the background area or you can erase the background manually.

You can also use an extract option which allows you to select the area you want to erase or keep. If you have erased the wrong area, you can undo the changes or use repair option. To edit the edges of an object more sharply, you can zoom in the photo with your fore-fingers. You can also change the background color of the editing screen using BgColor button.
- Once you have erased the image, click “Done” button.
- Finally, select the smoothness of the edges and tap the “Save” button. That’s it.

Now you have created your own personal sticker for WhatsApp. Our next step is to add this sticker in a custom WhatsApp sticker pack.
How to create a custom sticker pack for WhatsApp
Follow this step-by-step to create your own custom WhatsApp sticker pack –
- Download and install Personal Sticker for WhatsApp app on your Android phone.
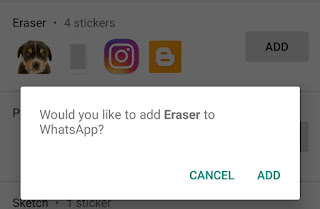
- Open the app and tap “Add” button next to the folder named Eraser which contains the WhatsApp stickers you have created.
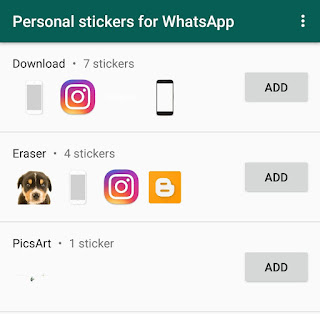
Note: A sticker pack must have at least 3 stickers. You can add up to 30 stickers maximum.
- Now you will be asked to add the sticker pack to your WhatsApp. Simply, tap the “Add” button.
We have used a separate app to create PNG stickers for WhatsApp, however, you can also use an alternative app called StickerMaker which provides a much easier and faster way to erase the background of an image and create a WhatsApp sticker pack.
We hope you find this guide helpful to create your own personal stickers for WhatsApp. If you want to ask something about this tutorial, let us know in the comment section below.
