Have you ever wondered how to upload Instagram reels from your PC? This can be really handy, especially if you prefer editing videos on your computer and want to skip the hassle of transferring files to your phone.

You have probably noticed that the web version of Instagram doesn’t allow you to upload reels directly from the browser. Additionally, Instagram doesn’t offer a desktop application like it does for mobile devices.
While it may seem like uploading reels is only possible from your phone, you can actually do it from your PC as well. In this guide, I’ll walk you through three different ways to upload Instagram reels from your PC.
Each method is easy to follow, so you can choose the one that works best for you. Let’s get started!
Table of Contents
Method 1: Upload reels from PC using Instagram website
Instagram does offer an option to create a post directly from its website where you can upload a video as well. If you choose to share a video on Instagram this way, it will automatically be posted as a reel. Here are the steps you need to follow:
- Start by opening your preferred web browser and go to the Instagram website.
- Enter your username and password to log in to your account.
- Once logged in, click on the “+ Create” option from the left-sidebar menu.
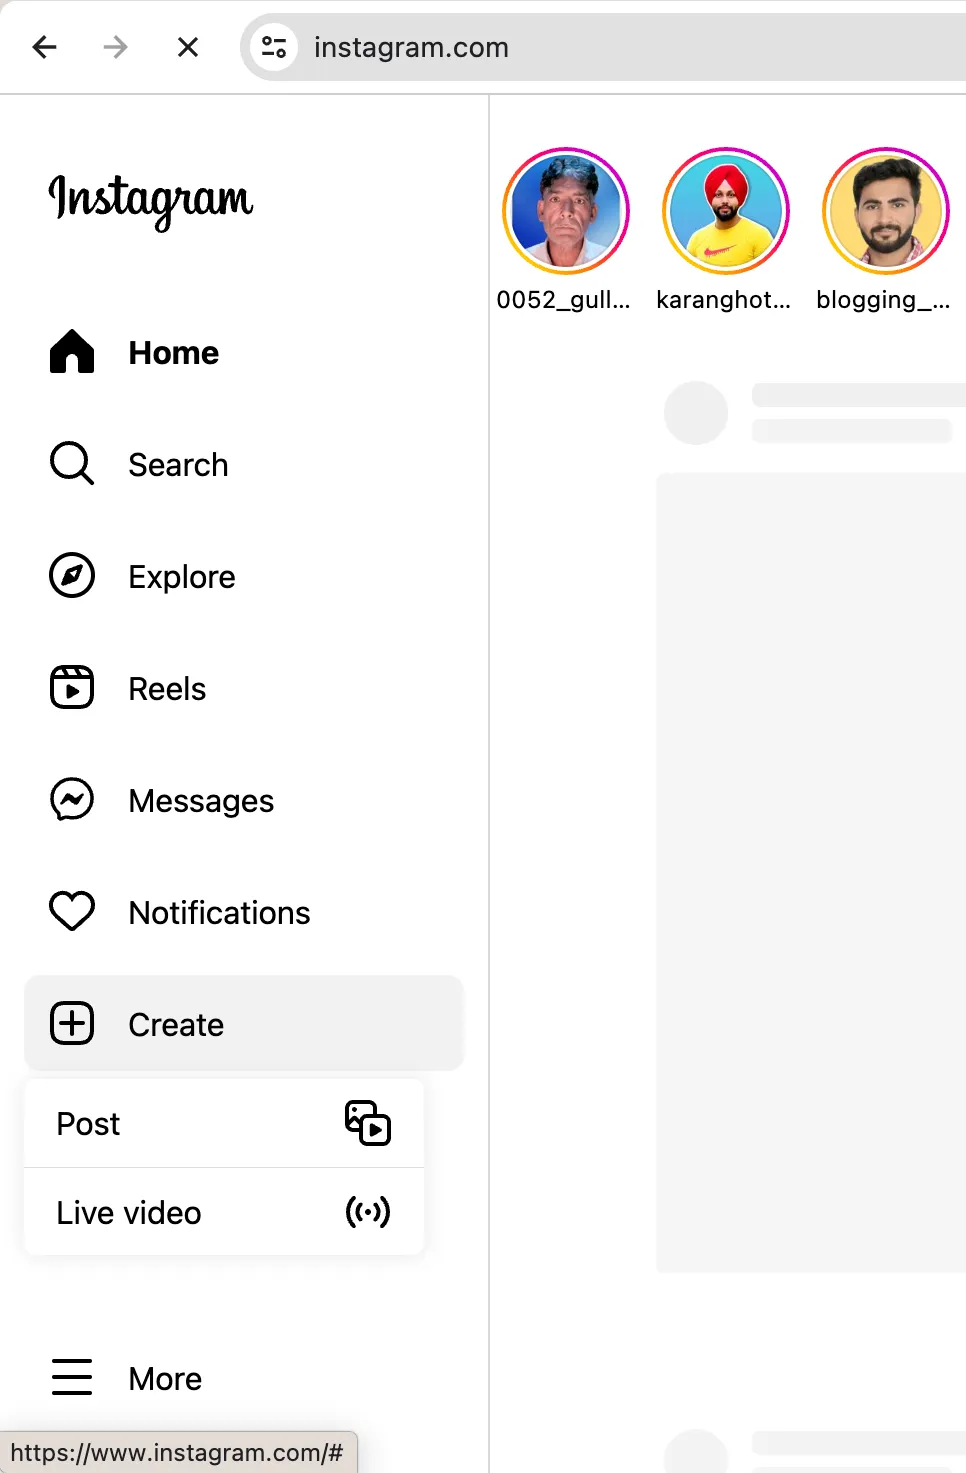
- Next, choose “Post” option. A pop-up window will appear on your screen.
- Click on “Select from Computer” and choose your video file.

- Once the video is uploaded, click on Next to continue. You can crop the video or keep the original aspect ratio.

- Next, you can trim your video and select a cover photo.

- In the following step, add a caption, location, hashtags, and tag people.

- When you’re ready, click “Share” to post your reel.
This method is straightforward and does not require any additional tools. However, the drawback is the limited editing options for your reel. You’re unable to add music or apply filters to your video as you can on the Instagram app.
Method 2: Upload Instagram Reels from PC using Meta Business Suite
Meta Business Suite is a powerful tool for managing your Instagram and Facebook accounts. Within the Meta Business Suite, there is a cross-posting feature enabling you to upload reels to your connected Instagram account directly from your PC. Here’s how you can use it:
- Open your web browser and go to Meta Business Suite at business.facebook.com.
- Log in with your Facebook account that is linked to your Instagram.
- Choose the Facebook Page that is connected to your Instagram account.
- Click on “Create Reel” option on the Home page.

- Under “Share to” heading, make sure that your Instagram account is selected.

- Select “Add Video” and upload your reel from your computer.
- Fill in the details for your reel such as the caption, hashtags, and cover image. Click on “Next” button to continue.
- In the Edit section, you can edit (crop, trim, and apply effects) and add a music to your reel.

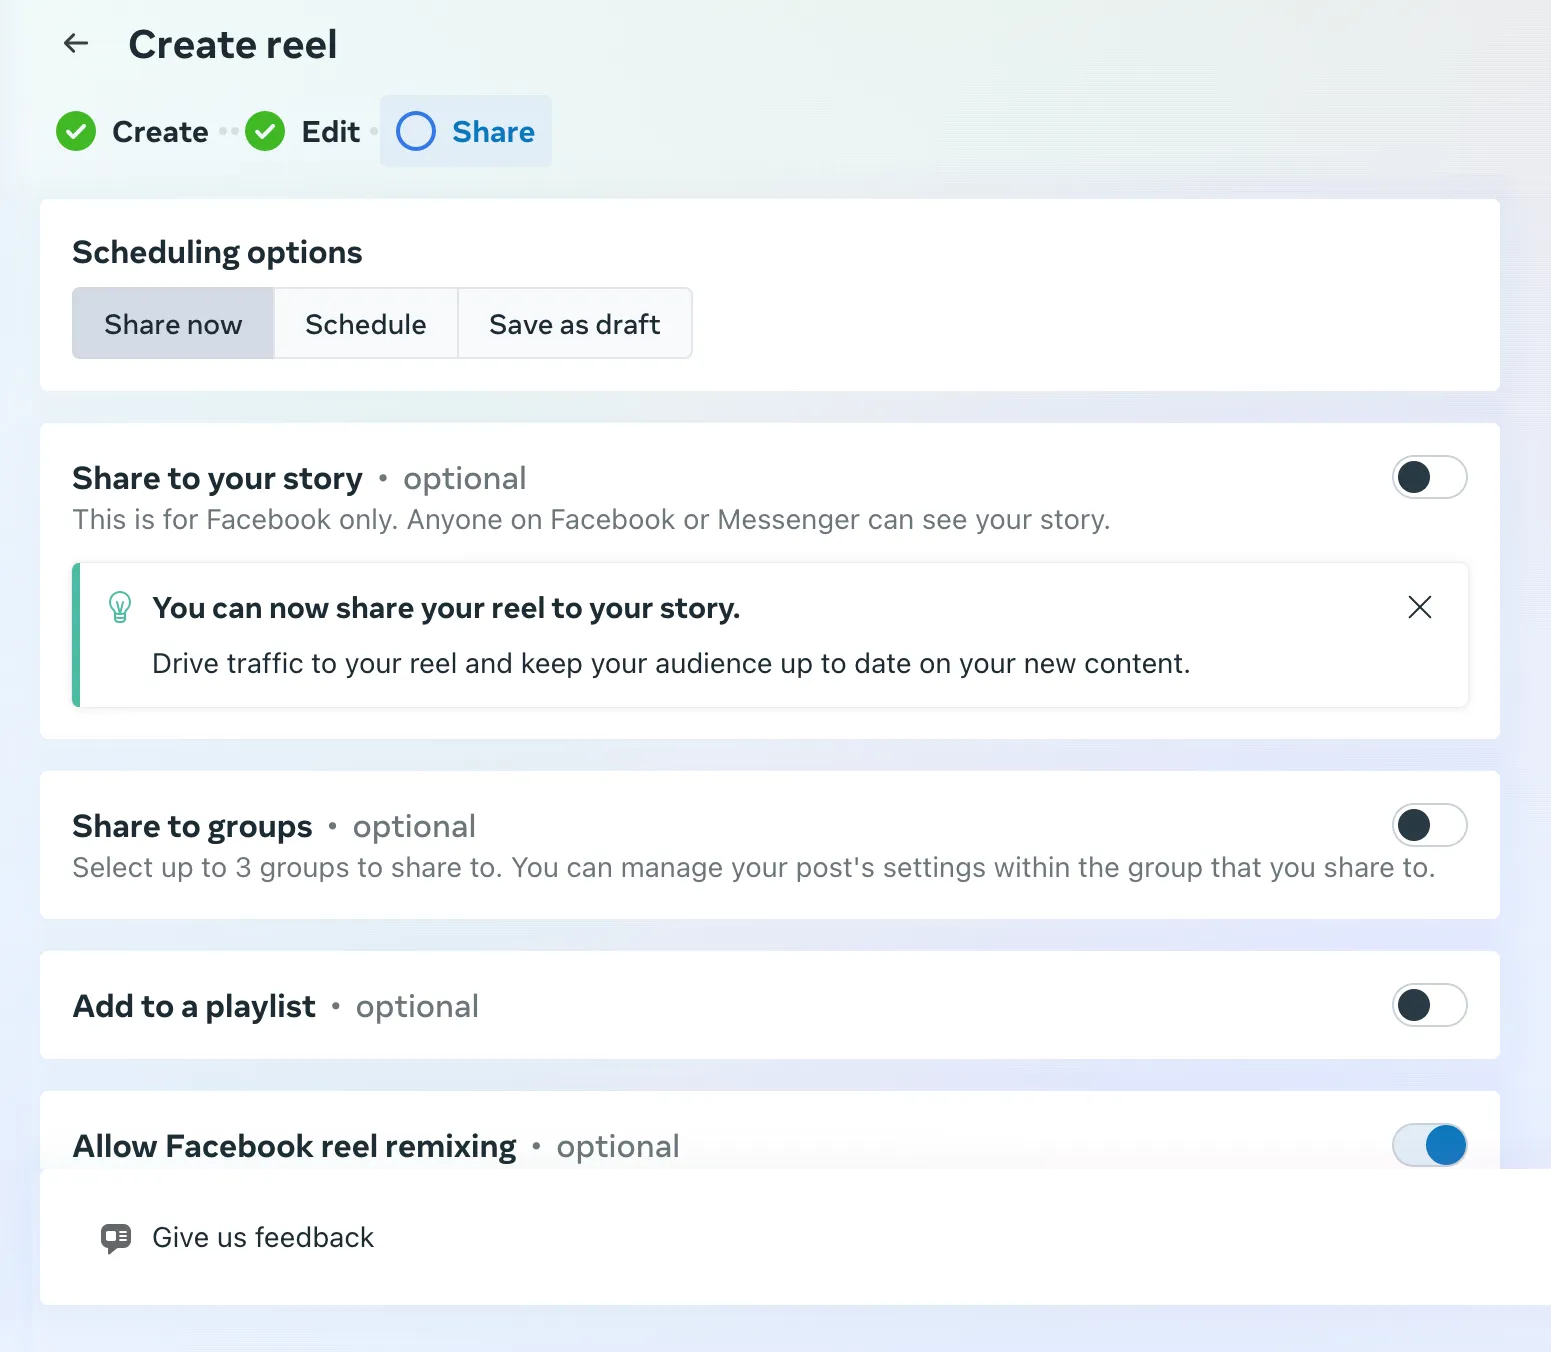
- Next you will move to the Share section where you can choose to share your reel, schedule it post at a specified time, or save it as draft. Click on “Share” button to upload your reel to Instagram.
Note: This method requires you to have a Facebook page connected to your Instagram account. If you only have a personal account on Facebook, you will need to create a new page and then connect it to your Instagram on Meta Business Suite.
Method 3: Upload Instagram reels using a Chrome extension
There are several Chrome extensions that can help you upload reels on Instagram directly from your PC. One popular option is “INSSIST” which is a web client for Instagram.
This extension also offers the ability to add music to your Instagram reels. You can select any royalty free music or upload a custom .mp3 audio file from your PC. Here’s how to use it:
- Go to the Chrome Web Store and search for “INSSIST – Web Client for Instagram” extension.
- Click “Add to Chrome” to install the extension.

- Again, click on “Add extension” in the pop-up menu to confirm.

- After installing the extension, click on its icon in the top-right corner. It will take you to the Instagram website.
- Log in to your Instagram account if you’re not already logged in.
- Click on the “+” icon at the bottom center of the screen.

- Next, choose “Reel” option from the pop-up menu.
- Select your video file from your computer.
- Once the reel is uploaded, tap the Next button to proceed.

- You can add a caption, hashtags, and select a cover photo for your reel. You can also add a music by choosing one from the available list or uploading your custom .mp3 audio file.

- Finally, click on “Share” to post your reel.
Using a Chrome extension can make the process feel more like using the mobile app.
Limitations When Uploading Reels from a PC
While uploading Reels from a PC is convenient, there are some limitations to be aware of:
- You won’t be able to use some of the editing features that are available on the Instagram app.
- You can’t add music from the Instagram Music Library. Only the original audio of your video will be used. If you want to add music, you need to edit your video beforehand using software like CapCut or VN.
- You cannot record reels directly from your PC. You need to upload a video that is already saved on your device.
- There is no option to upload reels in the highest quality.
- Although you can tag people normally, you can’t create collaboration reels.
- Some features like filters or stickers (GIFs) may not be available when uploading Instagram reels from a PC.
Final words
Uploading Instagram reels from your PC can save you time and make the process easier, especially if you prefer editing videos on a computer.
Whether you use the Instagram website, Meta Business Suite, or a Chrome extension like INSSIST, you now have the tools to share your reels without needing to transfer files to your phone.
Give these methods a try and see which one works best for you! If you have any questions regarding this topic, feel free to share them in the comments below.
Read other similar articles:
- How to Share Instagram Reels on WhatsApp Status
- 12 Ways to Fix Instagram Reels Not Uploading
- How to Share Instagram Reels on Facebook Automatically
- How to Upload Instagram Reels in Highest Quality
- How to Fix Audio Unavailable on Instagram Reels