Every other app you install on your smartphone these days asks for your email address to sign up. The same is the case with most online web services. Sharing your email ID with unknown parties can not only put your privacy at risk, but you also end up getting a lot of spam and malware filled messages on your email account.
To overcome this problem, Apple has create a feature called Hide My Email which is provided in iOS 15 and above so that you can keep your personal email hidden. This feature works on Apple devices by assigning a random and unique email address to apps and websites that ask for your personal email address to sign up.
iPhone and iPad users can also access Hide My Email directly by going to Safari, Mail, and iCloud settings. Whether you are a business person or just a normal user, this feature is extremely beneficial for everyone. Let’s learn how Hide My Email actually works to keep your personal email private and how you can use it on your iOS device (iPhone or iPad).
Table of Contents
What is Hide My Email on iPhone?
Email address is used for many different purposes. You are asked to provide your email ID when you create a new account with apps and websites or sign up for a newsletter. As your email address is linked to all your social media and banking accounts so if you ever forget your passwords, you can easily recover them through your email.
Even after so much use of email address, we do not take care of its security, whereas hackers always keep an eye on your email ID. Getting your email hacked can prove to be a big risk to your security and privacy. Keeping this thing in mind, it is important that you keep your email address safe and secure and don’t share it with unknown parties.
This is what Hide My Email feature is all about. It allows you to keep your personal email address hidden when you create a new account with apps/websites, sign up for a newsletter, or send messages to someone you don’t trust. Now you may have this question in your mind that how this feature hides your email address.
Hide My Email will automatically create randomly-generated email addresses for you when you sign up with your Apple ID to create a new account on apps and websites. These email addresses are unique and look something like this: 56mes26vxm@privaterelay.appleid.com
The new email address will forward all your messages to your personal email without sharing any information with anyone else. This way, you get saved from sharing your personal email address with third-parties and thus keeping it safe and secure from spam and being hacked. Please note that this feature only works with supported apps and websites.
There are basically two ways you can use Hide My Email feature on iPhone. The first one is by using it with Sign in with Apple, while the second one is with iCloud+. iCloud+, which is a premium service offered by Apple to provide cloud storage, family sharing, and other features, lets you do more with Hide My Email by allowing you to create as many email addresses as you want.
You can use these email addresses anywhere in your device, iCloud+, or in Safari browser for whatever purpose you need. Apart from that, you also have full control to manage or deactivate pre-existing random email addresses on your Apple device.
How to set up Hide My Email on iPhone/iPad
Once you have iCloud+ on your iPhone or iPad, you can set up Hide My Email by following these simple steps –
- Open the Settings app on your device and tap on your name at the top.
- Select iCloud option.

- Next click on Hide my email.

- Now tap on + Create new address. This will automatically generate a random email address for you with @icloud.com domain.
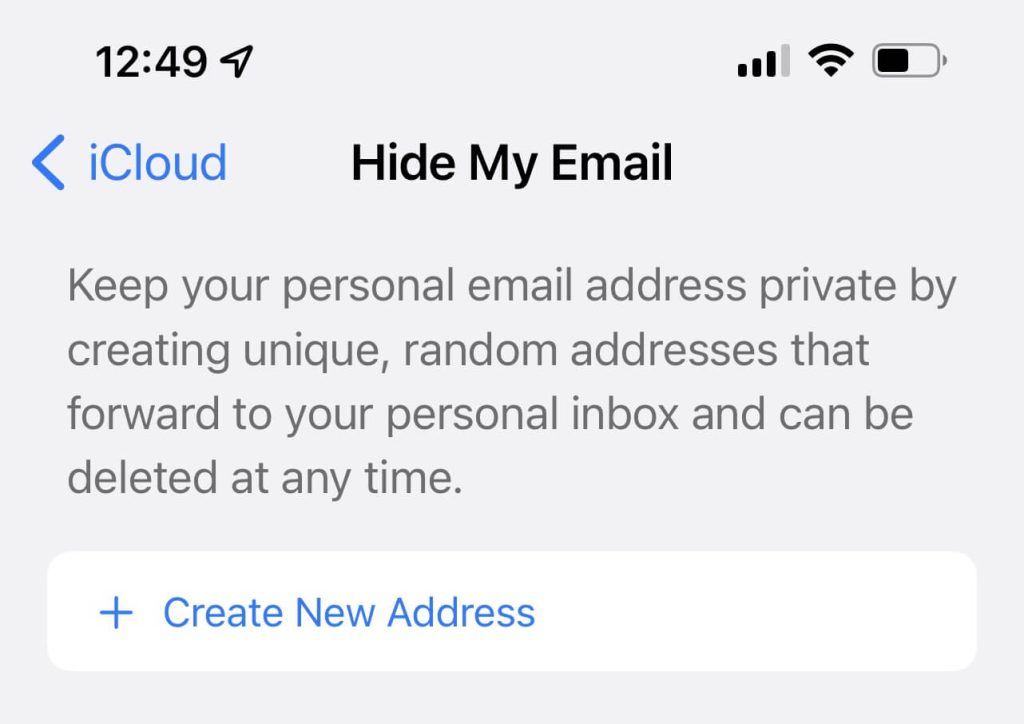
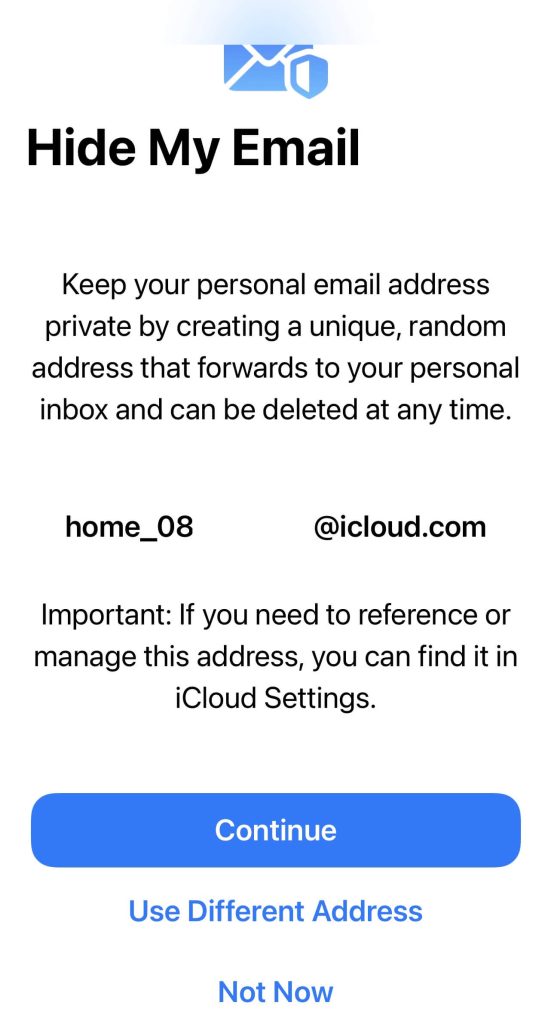
- Tap on Continue button if you like the auto generated address. If not, you can also generate another one by clicking on Use Different Address option.
- Label your address – In the next step, you will be asked to give a name for the address. This will help you to remember easily for which app or website you have created it. You can also write a small description in the Make a Note field which is optional.

- Finally, click on the Next option at the top-right corner and you have successfully set up your random email address. Go to the Hide My Email settings and you will find it added there. Now you can use this new email address anywhere you want.
Use Hide My Email on Safari
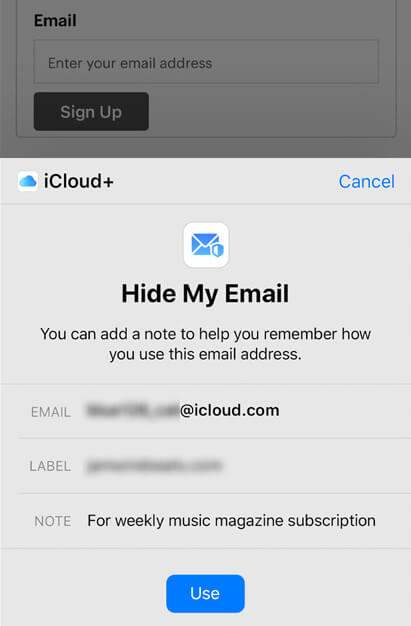
When you are on a website in Safari browser and you want to sign up to create an account or subscribe to a newsletter, you can click on the Email field and then choose Hide My Email option on the top of your keyboard to generate a random email address or select an existing one you have already created.
Use Hide My Email on Mail app
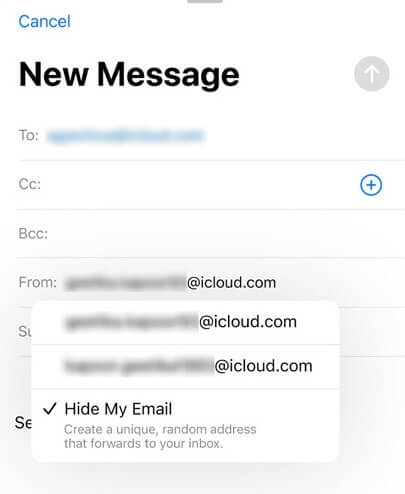
With the release of iOS 15.2 version, the scope of Hide My Email feature has extended to the Mail app. Users can now create random email addresses directly while sending emails. Just tap on the From field and then you will be asked to generate a random email address with the Hide My Email feature.
Manage or delete Hide My Email addresses
You can also manage or delete email addresses you have created with Hide My Email feature. Here are the steps you need to follow:
- Again open the Settings app and tap on your name at the top.
- Go to iCloud > Hide My Email.
- Now tap the label/name of the random email address you want to edit.
- If you want to change the label of the address, simply select the Label option and then edit it. You can also create a note to describe for what purpose you have created the address.
- If you want to delete the address, then tap on Deactivate email address option. Please note that this action can’t be undone. You will have to create a new address again.
Frequently asked questions
Yes, it is absolutely safe to use this feature. In fact, it is made to keep your personal email address safe from third-party apps and websites.
The messages you will receive on the randomly-generated email address from Hide My Email will be forwarded to personal email account. This redirection is set up by Apple itself.
Your personal email address which is linked with your Apple ID is set for forwarding by default. If you want to change it, go to Settings > [Tap your name] > iCloud > Hide My Email and tap Forward to. Here you will see options of email addresses that are available with your Apple ID. Select the one you want to use. That’s it!
To do this, simply deactivate or delete the random email address as we have discussed earlier in this guide. If you don’t need email forwarding, you can switch off ”Forward to”.
Please note that this feature is only available on the iOS 15 and above versions. If your iPhone or iPad is running on previous versions, you will need to update your software. Apart from that, you also need iCloud+ subscription on your Apple ID to use Hide My Email feature.
Final words
Hide My Email is indeed a great feature by Apple to keep your personal email address hidden so as to prevent spam and protect yourself from being hacked. From the next time, whenever you create a new account on third-party apps and websites that you don’t trust or sign up for a newsletter, always use randomly-generated email addresses by Hide My Email. We hope you have learned something new through this guide. If you have any questions in your head, fee free to share them in the comments below.

